Dew Heaters (Updated 2008)

The Bolton Group


Dew Zapper (orange) on Telephoto lens

Introduction

  • Homemade Heating System for telescopes/lenses/finders etc.
  • Uses 12 volt supply – safe!
  • Control unit for varying power/heat
  • Does not involve soldering many many resistors

Why buy a heater system when they are so easy make! The only tricky bit is finding someone with sewing skills!

Update 2008 - Much simpler heater band making and sewing!


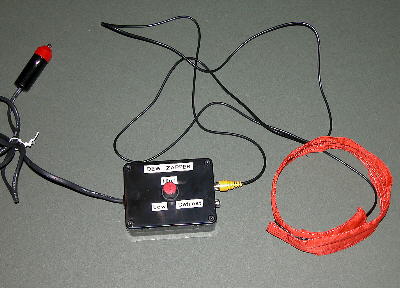
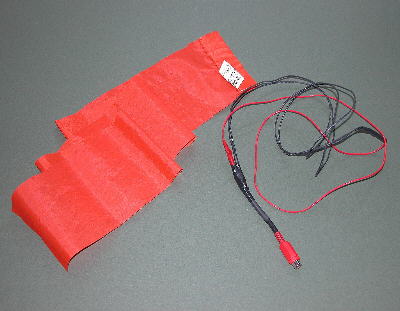
Finshed system: cigar lighter connector, control box and heater band. Note there are two outlets on the control unit - one not in use.


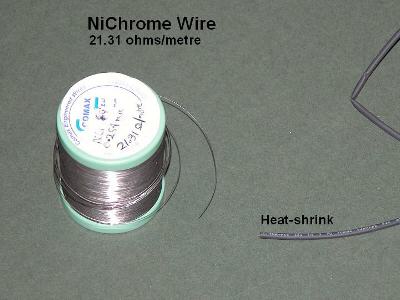
Roll of nichrome wire and heat-shrink.

Background

The invention of electric Dew Heater bands using wire seems to have been the brainchild of Canadian Mark Kaye. These were later to be made commercially by Jim Kendrick and the rest, as they say, is history. Mark Kaye published details of how to make them yourself but his webpage no longer appears to be available.

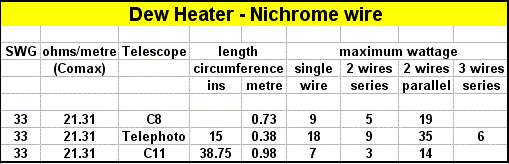
The principle is to use nichrome heater wire running around the telescope, lens, finder or eyepiece to provide gentle heat so as to prevent the formation of dew. Forget using multtiple resistors - they are crude point sources of heat and require many soldered connections. Nichrome is the way the professionals do it and it is the easiest and best for amateurs too.

The heat, providing it is not excessive, does not spoil the seeing – it just raises the temperature above the dew-point. The nichrome heating element(s) 
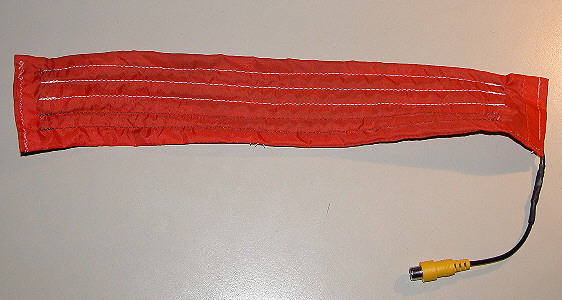
is sewn into a band, which is held in place by velcro. The electrical power 
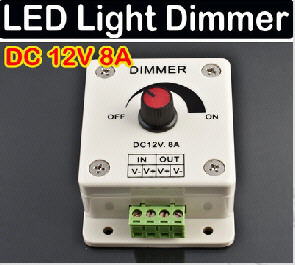
is provided by a 12 volt battery and the power is varied by means of a pulse- width modulation unit. These are used to control model trains and are relatively cheap. Experience would appear to indicate around 20 watts of power is ample for a typical Schmidt-Cassegrain telescope – less power for finders and eyepieces.

The maths is quite simple requiring just a knowledge of ohms law. The main formula is:

Wattage = volts x volts/(wire resistance x length)

= 144/ (wire resistance x length) for 12 volt supply

This is for a single strand of heater wire. Note the perhaps unexpected result of this formula is the longer the length of wire the lower the heating! If you need more heating then use two wires in parallel. Wires in series drop the power.

Construction

The first stage is getting the nichrome wire and in an appropriate resistance. I got mine from Comax (UK) in a resistance of 21 ohms/metre. This is fine for telescopes with their longer circumference but not ideal for eyepieces. The chart gives the values for using this on a few telescopes.


Before sewing. The cable has been wired up and, in this case, comprises one ordinary feed wire (red) and two nichrome wires (black) wired in parallel.


Mark2

This is the 2008 version - note the horizontal stitching to produce tubes down which the wires can be routed afterwards. Much simpler .


The pulse-width module has been mounted in a plastic box. The wiring is easy and two phono outlets have provided


Nichrome is bare wire and has to be covered in heat-shrink. Get the smallest you can – mine was 1.6 mm nominal. It is shrunk onto the wire with a heater gun. Depending what resistance and circumference you have will determine how many wires you need. I have made them with one to three wires to suit the telescope. Nichrome cannot be soldered but if wire joins are well twisted together then soldering over the joint will lock everything into place. You can then use larger heat-shrink to cover the joints. The connectors traditionally used are what we call phono in the UK. In later bands I have just brought the wires out of the band straight into a phono socket. A separate phono plug to phono plug lead can then used to connect to the control box. The trickiest part is sewing the nichrome wire(s) and any feed wire into the band. The material advised by Mark is nylon as used on waterproof clothing. I used an old pair of leggings. The band needs to be about 3 inches wide and will be folded in two with a seam. It ends up about 1.25 wide. A little wider will not hurt and make sewing easier. The length needs to be the circumference plus about 3 inches for overlap.

In the first ones I made, the wires are overstitched with a zig-zag stitch to one half of the band. This was difficult to do and at the same time keep the wires straight.When I needed some more bands in 2008 a simpler method was used. This new system involves stitching without the wires present - much easier! The material was folded over and stitched lengthwise in rows to form several tubes so that the wire could be threaded down them afterwards. Velcro is sewn on the overlap.

The control unit (pulse width modulation) was obtained from Maplin (UK) for £15. A box to house it will be needed and a connector to the 12 volt battery. These units vary the heating without wasting power. Trial and error will determine the setting. The maximum should only be needed if it has already dewed up.

Upadate: ebay now has LED dimmers at a fraction of the cost of Maplins units.

le dimmer


Return to Telescope Making main menu