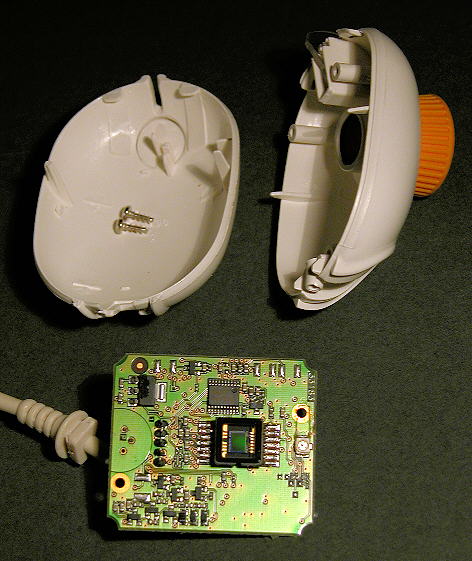
Philips Toucam Mk 1 opened up to reveal the circuit board
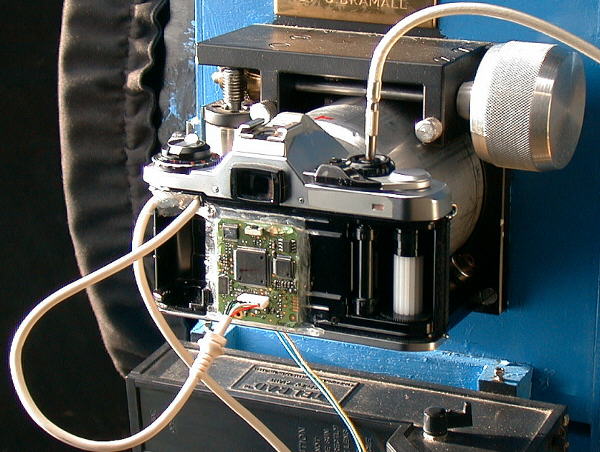
Pentax Toucam - prototype under first test. At this stage the circuit board is loosely in place.
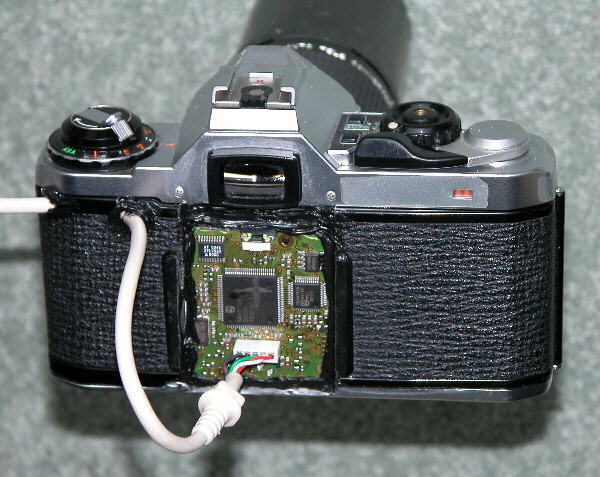
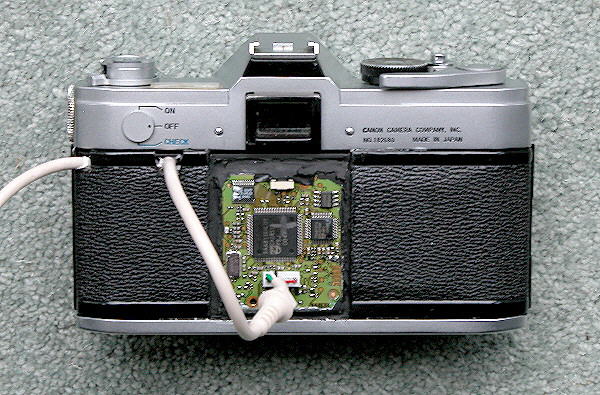
Pentax Toucam - the camera back has been cut in two and stuck back in place. Just looks neater
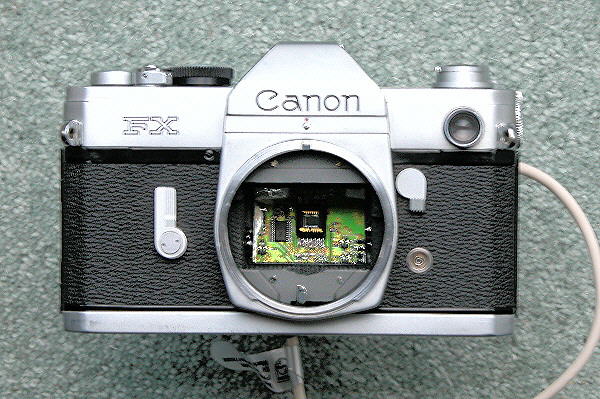
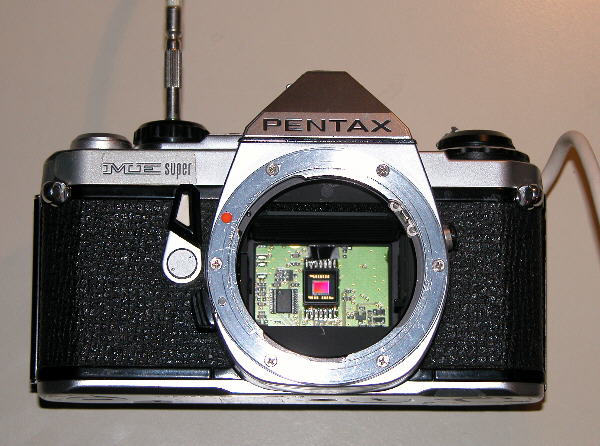 Front view - note tiny chip. Cable release is also attached to raise the mirror
Introduction
I was so impressed with the Toucam that I bought a second one and mounted it in the back of an old Pentax SLR. This proved a great success and makes imaging much easier.
This solution gives the advantage of a viewfinder and helps to get an approximate focus. It also makes attaching 2 or 3 times convertors on the front a doddle. A cable release is required to lock the mirror up for image taking. I have now built a total of 4 including 2 for friends.
Method
All that is needed is an old SLR body with a bulb setting and a cable release socket. Remove the back - easier on some cameras than others. Don't throw it away though - we will need it later . It will be cut down and stuck back either side of the circuit board.
The camera is easily opened and the circuit board removed. First job is that the microphone will need taking off - this is the dangerous part where you could destroy the toucam! The microphone sticks out so far that it has to come off. Just use snippers.
One thing to consider at this stage is the infra-red block filter. This can be taken off the back of the Toucam lens. Probably the easiest solution is then to place it over the CCD and silicon around the edges to secure it. Make sure you don't trap any dust in between as you won't be able to clean it off. I haven't done this as I preferred to use an infra red block filter elsewhere in the image path.
If you are not worried about focus then the circuit board can simply be siliconed in place. However, if you want to get at or inside focus then the back of the camera will need surgery where some of the circuit board components foul the film rails. If the circuit board is beyond focus ie too far out then camera lenses won't focus. If its inside focus then they will - so err on too far in if anything. However, it is desirable to get as close to focus as possible as this is a big help when focusing.
The CCD must be dead centre ie when you centre an object in the camera viewfinder you can guarantee the image will hit the chip. In this position some components will hit the film rails. The rails will need grinding down in these places - easy really. It's just trial an error until its low enough and central.
At the same time don't forget to tape over the red LED which is such a nuisance - I use a small piece of black insulating tape.
How do you work out when the chip is dead centre? I pencil a cross on the back of the circuit board where dead centre is. You can then see from the back and get positioning right. I glued the circuit board down with a few epoxy spots.
The usb cable I take around the film spool. This means if ever the cable is jerked then the board is not wrenched off! The camera back is cut to size and stuck back. The whole is then sealed with black silicone.
The camera is ready for action. If you have taken trouble to get close to focus then acquiring images will be easy. With a webcam if you are far from focus no image is visible so being near to focus saves a lot of frustration. Don't forget the cable release to raise the mirror when you want to begin imaging.
Good luck and have fun!